
I had intended for this post to be a tutorial on how I merged together two elements from different patterns but in my final session I got all excited and ended up forgetting to take enough photos so it will therefore be a combination of pattern review and tutorial. I figured you would need to have the book to obtain the patterns so all in all it should be easy enough to follow.
I have been making this dress as part of my sewing classes so it's fair to say I also have an expert on hand to help!
So I made the bodice from the dress on the front of the book and the skirt from the tulip dress - I wanted a dress for summer without sleeves but with a full skirt and wasn't keen on the tiered efefct.
I happened to have the fabric that I needed but the handy pattern inside the book suggests the supplies that you would need to buy. My supplies were:
- Printed pattern from the CD which comes with the book
- 2m of outer fabric (lilac cotton which has a shot silk appearance)
- 2m of lining (book doesn't suggest lining but I found it easy enough to add)
- 1m of co-ordinating net
- 4 beautiful buttons

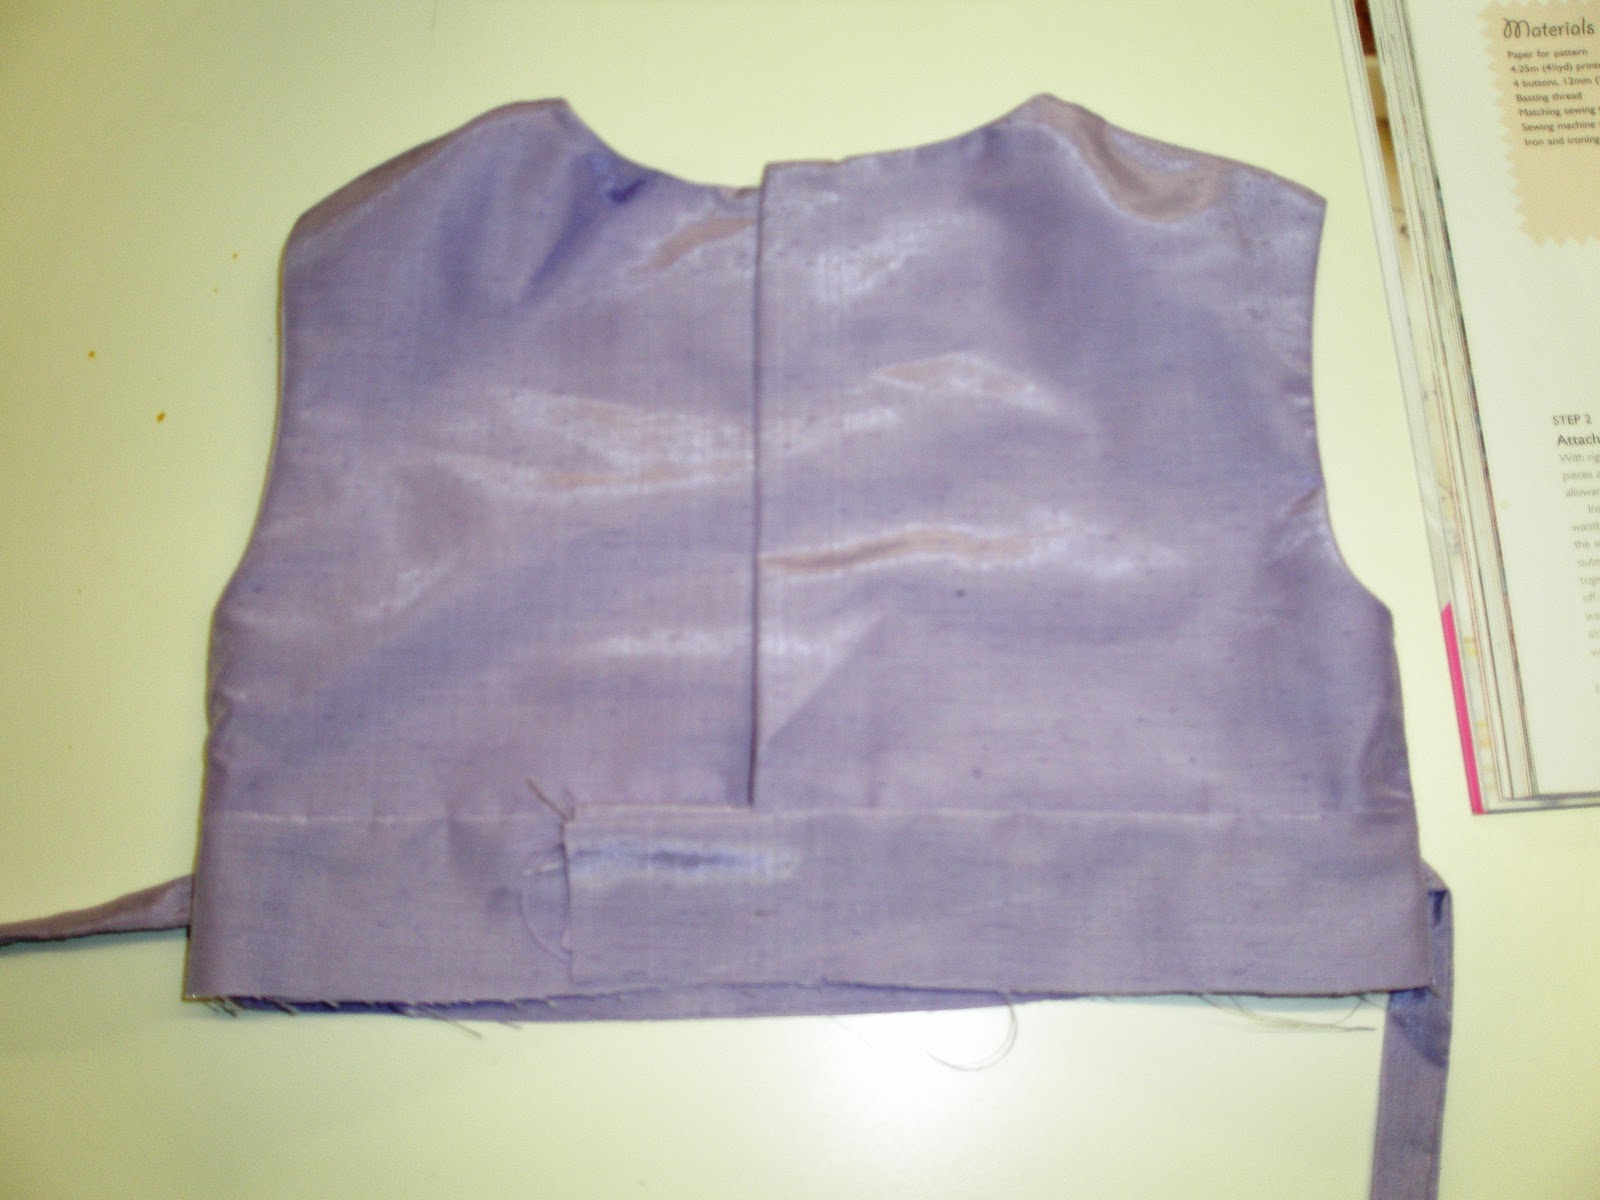
Step 2 - With right sides together, pin the lining and main fabric together and sew at along the top neckline, then around the armhole and down the side of the bodice. Do not sew across the shoulder seam or the bottom of the bodice pieces. Repeat for the other back bodice piece and also for the front bodice. Turn the bodice pieces right side out and on the two back bodice pieces fold and press the back button placet as per the instructions. The back should now look like this.


Step 7 - Align the side seams and pin these 2 long waistband pieces to your bodice, ensuring that the ties are in the correct place at the side. You should now have your bodice captured between 2 waistband pieces. Sew along the wasitband section and your garmet should now look like this


So that completes my bodice - coming soon the pattern review post for the skirt (because I got too excited and didn't get enough pictures). Please feel free to comment or e:mail me if you have any queries, it is all quite complex and I appreciate it's sometimes hard to work out just what should happen at each step.
Keri
No comments:
Post a Comment